Virtual Ceremony - Customize Your Page
Overview
This guide will help you set up and customize your virtual ceremony webpage and manage your virtual graduate slide database. Whether you’re hosting your slides on an internal site or with Tassel, graduate slide content changes and additions will be managed here.
Important: You will receive an email as soon as your virtual hub is ready for you to make edits and customizations. Once your data has been processed and you receive your Director software, your graduates will be published to the Participants Tab.
To begin, login to https://virtual.tassel.com
Customization Details
On the Details tab choose the ceremony from the ceremonies dropdown. Now you can add and edit content to your page.
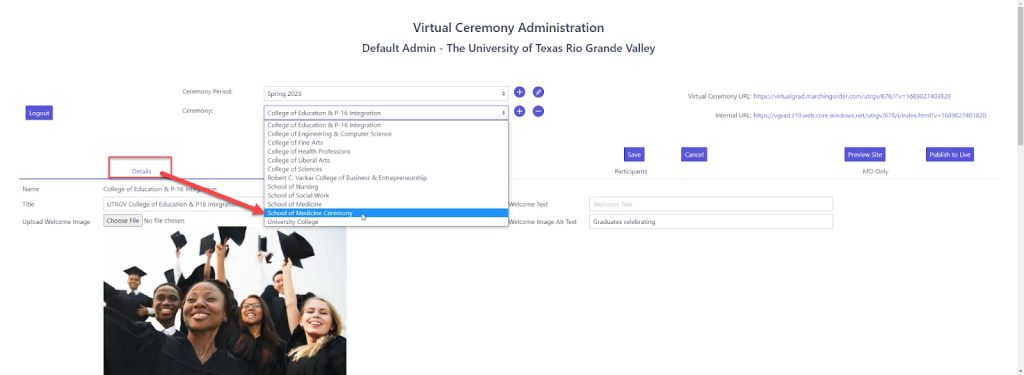
- Add a title to your ceremony page.
- Upload a ceremony-specific Welcome Image (.jpg or .png format) and a brief Welcome Message.
- Add a Welcome Message.
Show Year Watermark? Enables the current years’ watermark to appear on your virtual page for an added flourish.
Meta Title lets you to control the HTML Title of your virtual veremony page. It will appear in the browser tab in which the virtual veremony is displayed, and it is also important for users of assistive technologies to understand the content of the page.
Meta Description allows you to add a meta HTML tag to your virtual veremony page. It will not be visible to most visitors, but users of assistive technologies and search engines will use this information to better understand the content of the page.
Set Open Date: Set the date/time when you want your page to go public to all users. Before your ceremony start time, visitors will see a message telling them when the page will open. NOTE: This message is not editable.
Message Title and Message Section: Insert an option message to your graduates from the school, complete with a message title.
Additional Settings Information
You will find options to choose school colors, upload logos, add additional message text with embedded URL’s, and more.
- Set Graduate area title. This is the title that will appear above individual grad slides.
- Social Media Components:
- For Twitter, enter your @username and a hashtag.
- TIP: Third-party video players and social media aggregators/visualizers that offer an embed code can be inserted into the Message section using the Tools menu.
- “Filter 1 Label” and “Filter 2 Label” functionality will be set up based on your filter options previously selected with your Customer Success Manager (e.g., Degree, Major). The filter titles will be pre-filled for you, however you do the ability to change the filter names. You also have the ability to remove these filters by clearing the filter labels. Use the Preview Site option to check the filters, and if the dropdown values don't match your expectations, contact your Customer Success Manager.
Click Save and Preview Site to review your changes. When your changes are complete, click Publish to Live.